3 Secret Tips To Increase Height Quickly

3 Secret Tips To Increase Height Quickly

Our height can influence our professional and personal life to a great extent. That’s why a majority of men and women are always looking to get taller.

There are vital perks both in terms of health and lifestyle if you are a few extra inches taller.

Method One: Yoga

There are some effective ways of increasing your height. In this article, we’ll mention a few of the best ways you can grow taller.

The best yoga exercises to increase height

I have found that yoga effectively addresses your height issues. A good posture is key to better height. It is crucial to maintain rhythmic and deep breathing when performing yoga(follow the recommendations in the video).  The main goal is to build a relaxed and conscious body to eliminate every obstacle in your path to becoming taller.   https://www.quora.com/Can-yoga-poses-increase-height

1. Surya Namaskar Pose

3 Secret Tips To Increase Height Quickly

There are 12 amazing Yoga poses[asanas] that help you grow taller naturally. The video is an illustration to help you do asanas more accurately. I will be focusing more on some of the complex yet powerful asanas from Surya Namaskar that will help you to achieve your desired increase height faster.

2.  Sukhasana Pose

The sukhasana has the potential to draw you into a deep meditative state. It extends your spine which gradually helps your height.
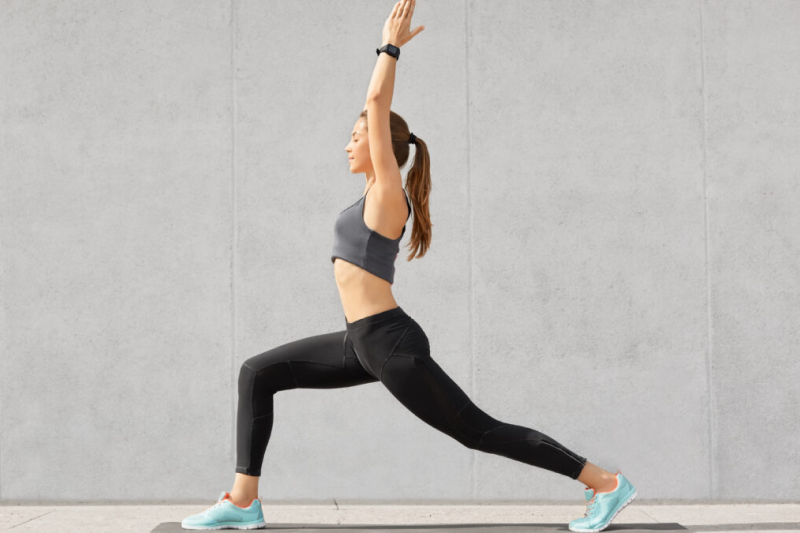
3. Tadasana Pose

The Mountain pose; is the base of all standing poses. It improves flexibility while building strength in your arms, legs, and spine. Works best for increasing height if practiced from an early age.

4. Puppy Pose

The puppy pose mainly targets your spine and leg muscles to help you grow faster & Increase Height. This relaxed pose will help you a lot in strengthening your back.

5. Utthita trikonasana Pose

The pose of the triangle; It helps in improving body balance and allows you to have good posture. This asana is especially useful for relieving stress.

6. Adho Mukha Svanasana Pose

Dog pose face down; one of the most acknowledged poses that contributes to a better height. It increases blood flow to the face and neck, thereby keeping your skin radiant. It also reduces stress and enhances mental health.

7. Prasarita padottanasana Pose

It stretched spine posture, directed at every part of the body – from head to toe. It is useful for those who have a noticeably shorter lower body.

For more info, visit https://food.ndtv.com/health/yoga-for-beginners-10-basic-poses-to-get-you-started-1229662

8. Akarna Dhanurasana pose

In Sanskrit, “a” means ” in the direction”, “next.” Karna is the “ear”, Dhana – is “the bow”.

The asana resembles an Archer pulling a bow. It is performed in two steps. Minor deformations of the hip joints are corrected. The asana increases the flexibility of the legs and abdominal muscles, increasing intestinal motility.

9. Anantasana pose

The pose of this asana resembles the temple dedicated to God – Ananta Padmanabha (Padma – lotus, nabha – navel), located in Trivandrum, India. It relieves back pain and stretches the pelvic floor muscles preventing the formation of a hernia.

10. Ardha Matsyendrasana I pose

3 Secret Tips To Increase Height Quickly
Ardha Matsyendrasana – A simplified version of Paripurna Matsyendrasana – a posture in which the spine curls as deep as possible. Regular practice of this asana prevents enlargement of the prostate gland and inflammation of the bladder.

11. Ardha Matsyendrasana II pose

In this asana, the abdomen contracts, and stretches simultaneously. Thanks to lateral twisting of the spine, lumbago, as well as pain in the back and hip joints, quickly disappears. The neck muscles are strengthened, and the shoulder joints become more mobile. Regular practice of this asana prevents the enlargement of the prostate and bladder.

12. Cow Pose

You can efficiently work on stretching and lengthening your spine with this pose. This pose is straightforward to master, and helps in working on the upper part of your body.

13. Tree Pose

This pose teaches excellent self-control and balance. People of all ages can easily benefit from this pose.

This pose is done by doing a namaste with arms above your head. After this, you have to raise a leg and bring it up to the knee of the other one and rest it there.

Method Two: Food

1. Chicken

Another element, taurine found in chicken that can help you with your height.

2. Almonds

Along with healthy fats, magnesium, and fiber, Vitamin E found in Almonds acts as an antioxidant inside the human body. Eating a recommended amount of Almonds regularly can help improve our bone health and increase height.

3. Yogurt

Yogurt also helps to cope with many growth-related issues in children. Probiotics are healthy bacteria found in yogurt that enhance metabolism helping us to grow taller.

4. Eggs

Each egg contains up to 6 grams of protein. Vitamin D found in the eggs promotes the absorption of calcium in your bones, promoting growth especially in children.

Method Three: Exercise

Here are some of the well-known exercises that can help you grow taller in a short period of time.

1. Hanging

The exercise strengthens your upper body and increases height.

2. Jogging

3. Skipping

Skipping is the exercise that you can conveniently do at your home. This exercise will also help make your legs longer.
I don’t generally consider myself to be so moving—I just never thought of myself like that. I was consistently a fit individual; I was on my turn bicycle each morning and my yoga tangle presently. Yoga for me was absolutely wellness from the outset—I enjoyed the mantras and mudras, yet I didn’t generally get them. For me, it was just about the rawness—and afterward, I became ill. I don’t think anybody ever hopes to hear the words “you have malignant growth.” When disease came thumping it beat down the entryways and my entire world changed. I recall after three major medical procedures and just before chemotherapy, my instructor at that point, KK Clivio, would come and help me inhale, and that got me through the accompanying medical procedures. I recollect the first occasion when she got me into Pigeon with many, numerous props, I at long last let it go and just cried. What’s more, she simply continued saying “Breath. You should simply relax. It’s going to be alright.” I remember such a large number of people disclosing to me that I needed to fight, yet you don’t unwind and you don’t discharge and you don’t inhale when you fight, and afterward, I at long last acknowledged I simply needed to appear. I simply needed to appear each week and sit in that chemo seat and let the medicine do what is expected of it. I currently can say that yoga gave me a new life.

I had various medical procedures despite everything working through malignant growth. I have no inclination at all under my left armpit down to my elbow, and I’ve grappled with the way that my training won’t appear as though everybody else’s, and I’m not going to have the option to handstand without help. Furthermore, that is alright, in light of the fact that help is the thing that gets everyone through; we as whole need assistance. It’s my yoga practice and my locale at Laughing Lotus Yoga Center in New York City that helped me locate the genuine significance of family and backing, and that it is so imperative to give up and simply relax. I simply keep appearing, and I continue appealing to God for myself, for my companions who I’ve lost to bosom disease, and for all who battle with this horrible and brutal condition

Mountain Climber (Running Planks)

Mountain Climber (Running Planks)

Benefits

  • It is a full-body exercise. It strengthens whole lower body muscles and shoulder.

How to do

  • Begin with traditional plank position — shoulders over hands and weight on just your toes.
  • Bring your right knee forward under your chest, with the toes just off the floor.
  • Return to your basic plank. Quickly switch and pull the left knee in.
  • Continue switching knees and start to pick up the pace until it feels a little like running.
  • Keep On “running” in your plank for 30 seconds.

Video

Tips 

  • Do not bounce on your toes as you perform the move. 
  • Do not focus much on speed rather focus on complete move of your legs. 
  • Arms and hands should be straight down from your shoulders. 
  • Your back should not be curved. 
  • Your hips should not be raised. 

Warnings

  • Avoid if you have any recent or chronic injury to the Spine, back or shoulders. 
  • Always work within your own range of limits and abilities. If you have any medical concerns, consult with your doctor before practicing. 
Sitting half spinal twist pose (Ardha Matsyendrasana)

Sitting half spinal twist pose (Ardha Matsyendrasana)

Benefits

  • It providing nutrients, blood, and oxygen, and improving the health of the reproductive system as well as the urinary system.
  • Beneficial for menstrual disorders and Energizes the spine,
  • Stimulates the liver and kidneys

Tip

  • The many hand variations in this pose can make it quite hard for beginners to adapt. So, make sure you sit on a blanket and practice this pose.
  • Before you try the hand and arm variations, just wrap one arm around the raised leg, and hug your thigh to your torso. With practice, you can start trying other variations.

How to do

  •  Sit straight with your legs stretched out. Make sure that your feet are placed together and your spine is absolutely erect.
  • Bend your left leg such that the heel of the left foot lies next to the right hip and You could also keep the left leg stretched out if you like.
  • Place the right leg next to the left knee by taking it over the knee.
  • Twist your waist, neck, and shoulders towards the right, and set your gaze over your right shoulder. Make sure your spine is erect.
  • Then You can place the right hand behind you, and the left hand on the right knee.
  • Hold the pose for a few seconds, about 30 to 60 as you breathe slowly, yet deeply.
  • Exhale and release the right hand, and then the waist, chest, and finally the neck. Relax as you sit straight.
  • Repeat the same procedure to the other side.

Video

Warning

  • Avoid this pose during pregnancy and menstruation as it entails a strong twist at the abdomen.
  • Those who have recently undergone abdominal, heart or brain surgeries, should not practice this asana.
  • People with a hernia or peptic sores must do this pose carefully and under the supervision of a certified yoga instructor.

52 Head-to-knee Forward Bend (Janu Sirsasana)

Head-to-knee forward bend (Janu Sirsasana)

Head-to-knee forward bend (Janu Sirsasana)

Benefits

  • Therapeutic for high blood pressure, insomnia, and sinusitis
  • Relieves anxiety, fatigue, headache, menstrual discomfort
  • The liver and kidneys are stimulated.
  • Menstrual and menopausal disorders are reduced.

Tips

  • Make sure the bent-leg foot doesn’t slide under the straight leg. You should be able to look down and see the sole of the foot. 
  • Keep the bent-leg foot active too. Broaden the top of the foot on the floor and press the heel toward the inner groin of the straight leg.

How to do

  • Adjust the surface under your seat so that your sit bones are firmly anchored.
  • Bend your left knee and bring the sole of your left foot to your right inner thigh.
  • Square your torso over your extended right leg. Begin to bring your torso down to your leg by angling your pelvis forward so that the bend initiates from your hips instead of your lower back.
  • Keep your right foot flexed while pressing the back of the right thigh down toward the floor.
  • When you reach your maximum forward bending limit; you can maintain your straight spine and long neck in an active position, or you can relax your heart and head down toward the extended leg, allowing the spine to round.
  • If your hands reach your foot, hold your foot. If not, you may hold on to your ankle or calf, or place your hands on the floor wherever they reach.
  • On each inhale, extend the spine long. On each exhale, deepen the forward bend.
  • Stay here for five to 8 – 10 breaths and then straighten both legs, shake them out, and repeat the pose on the other side.

Video

Warning

  • Avoid this pose if you’ve recent or chronic back or knee injury or inflammation.
  • If during this asana you have any kind of leg cramps or you have pain in your knees, then you should immediately leave that posture, do not forcefully try to do this asana.
Legs up the Wall Pose (Viparita Karani)

Legs up the Wall Pose (Viparita Karani)

Benefits

  • Relieves tired or cramped legs and feet
  • Alleviates headaches
  • Relieves lower-back pain
  • Calms the mind

Tips

  • Use your breath to ground the heads of the thighs bones into the wall, which helps release your groins, belly, and spine. 
  • In the pose imagine that each inhalation is descending through your torso and pressing the heads of your thigh bones closer to the wall. Then with each exhale, pin your thighs to the wall and let your torso spill over the bolster away from the wall and onto the floor.

How to do

  • Find an open space near a wall and sit next to it, such that your feet are on the floor, spread in front of you, and the left side of your body is touching the wall.
  • Gently lower your torso down to the ground as your legs lift up against the wall.
  • Option to place a block, pillow, or folded blanket under your hips to release any discomfort in the low back or hamstrings.
  • Allow your head to rest on the ground or a pillow and place your arms wherever they are most comfortable.
  • Stay in the posture for up to 15 minutes.
  • To release, push the bottoms of your feet into the wall and lift your hips slightly. If using a support, move the support out of the way. Gently roll to one side and stay for a few breaths before returning to your seat

Video

  • Option to place a block, pillow, or folded blanket under your hips to release any discomfort in the low back or hamstrings.
  • Allow your head to rest on the ground or a pillow and place your arms wherever they are most comfortable.
  • Stay in the posture for up to 15 minutes.
  • To release, push the bottoms of your feet into the wall and lift your hips slightly. If using a support, move the support out of the way. Gently roll to one side and stay for a few breaths before returning to your seat

Warning

Avoid this pose during below condition.

  • Menstruation
  • Pregnancy
  • High blood pressure

If during this asana you have any kind of leg cramps or you have pain in your knees, then you should immediately leave that posture, do not forcefully try to do this asana. 

Reclining Bound Angle Pose (Supta Baddha Konasana)

Reclining Bound Angle Pose (Supta Baddha Konasana)

Benefits

  • It soothes the digestive and the reproductive systems and treats conditions like irritable bowel disease, infertility, menstrual disorders, digestive issues, menopause, etc.
  • It gives your groins, internal thighs, and knees a good stretch.
  • It reduces muscle tension and relieves you from tiredness and insomnia. It also calms the mind.

Tips

  • If you are a newbie to this pose and straining your thigh and groin is too difficult for you, then add some pillows to support your knees and supporting them against the gravitational pull.

How to do

  • Lie straight on your back with your legs straight.
  • Step your heels towards your pelvic
  • Exhale and let your thighs fall apart; open up your knees so that the bottoms of your feet touch each other.
  • Carefully pull your heel close towards your pubic area to experience a good amount of resistance.
  • Breathe and hold for 4-8 breaths.

Video

Warning

  • Avoid practicing this pose if you are suffering from knee injuries, groin injuries, pain in the lower back.
  • Pregnant ladies should perform this asana under expert supervision.
  • Women who just conceived a baby should also restrain them self from this pose until their pelvic region heals.